Click play to watch a video on handling an email.
There are a number of ways in which you can respond to your emails.
Procedure #
Step 1:
Click on Inbox.
A list of the emails that are allocated to you is displayed.
Step 2:
Select an email from the list.
Its content is displayed in the workspace area.
If the customer has a contact record, the contact details are displayed on the right.
Step 3:
To make the email become your currently active email, click

Note: When you are working on an email, your status changes from Available to Handling an email, and the Active Item dialog is displayed.
Step 4:
To reply to the email:
a. Click on either of the following

To reply to one person

To reply to all
This opens a text editor where you can compose your reply.
At the top of the reply box there are controls to adjust the text format, add an attachment, or add a pre-defined text block:

b. If required, for To:, enter any additional email addresses to which the email should be sent.
Multiple email addresses can be added here (but only if your company administrator has authorised you to add or amend email recipients).
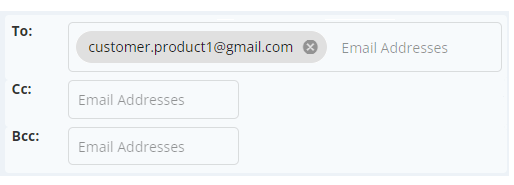
To delete an email address, click:

Note: The email address of the original sender cannot be deleted.
c. If required, for Cc: and Bcc:, enter the email address(es) for Carbon Copy (CC) and Blind Carbon Copy (BCC) email recipients.
Multiple email addresses can be added here (but only if your company administrator has authorised you to add or amend CC and/or BCC email recipients).
To delete an email address, click:
d. Click in the email text editor area and then type in your response or select a pre-defined response text to insert by clicking:

and then selecting a text block from the dropdown list. (You may find that a template text block is automatically inserted into your response, if your company administrator has defined one.) The text block is inserted at the position of the cursor, so you can insert it anywhere in the email body, and may contain placeholders for you to fill in, such as your name and/or identification number. Use the rich text editor to format your text as required. Multiple text blocks can be inserted and the same text block can be inserted more than once. If no text blocks have been defined by your company administrator, the dropdown list of text blocks is not shown.
e. If required, select a file to attach to your email response by clicking:

and then select an attachment from the dropdown list. You can search the list of attachments, for example, for a particular label. Multiple file attachments can be added to each email response.
Any selected file attachments are displayed above the response input. If you hover your mouse over any of these, you can see a description of the file attachment. If you click on a listed file attachment, it is downloaded, so you can view the content to ensure that it is relevant.
To delete a file attachment that may have been added to your email response in error, untick the appropriate checkbox in the list.
f. When you are composing an email response, it is automatically saved as the work-in-progress draft at regular intervals. An indicator shows when autosaving is in progress. You can also choose to save the current draft response manually, in which case the published version is updated and the work-in-progress draft is deleted. Work-in-progress drafts can only be viewed by the allocated agent; your supervisor can only see published drafts. To discard a partial or complete draft response, click:

g. If required, select a classification from the classification dropdown list in the Active Items dialog.Once you have responded to the email, the classification is displayed in the customer’s Contact History.
h. If required, add comments in the Notes area.
If the email is assigned back to the original agent or to another agent, or is put back onto an email queue, any notes are saved for the next agent to see. Notes are also useful for anyone who is reviewing the email response before it is sent. Notes are discarded when the email is resolved.
i. To send the response, click:

Step 5:
To park an email (retain ownership of the email without being considered to be actively working on it), click:

The email is returned to your inbox. You may want to do this if you are switching between emails and want to handle this email at a later time.
Step 6:
To return the email to the queue and remove it from your inbox, click:

If you are currently composing a response email, choose whether to save or discard the partial or complete draft response. Any agent that views this email will see the saved draft response text.
Step 7:
To transfer the email to another agent or another queue:
a. Make the email active (if it is not already) by clicking:

b. Click:

c. Select either another agent who is in your group(s) or another queue to which you are assigned.
d. If you are currently composing a response email, choose whether to save or discard the partial or complete draft response. Any agent that views this email will see the saved draft response text.
The email is removed from your emails inbox.
Step 8:
To forward the email to someone in the back office (someone who is outside of the Contact who can help answer a difficult email):
a. Make the email active (if it is not already) by clicking:

b. Click:

c. For To, enter the email address to which the email should be forwarded.
Note: You can forward the email to any email address and, if required, to multiple email addresses.
d. For Reply To, select one of the following options from the dropdown list:
- The originator’s email address
- The agent’s address from the user record
- noreply@contactcentre.com
e. For Subject, enter the subject of the email.
f. If required, you can edit the body of the email before forwarding it by clicking in the email text editor area and then typing in your response or selecting a text block to insert, as you would when replying ordinarily to an email (see above).
g. Click Send.
The email remains in your inbox to be dealt with once you receive more information from the back office user. Any response will be sent directly to your email address, not back into the Contact. If a response is not required to resolve your enquiry (that is, the back office will handle the email directly), you can close the email.
In the signature of the email the recipient will see the agent who sent the email and the email queue from which it was sent.
Step 9:
When you have finished working on an email, click:

The email is removed from your inbox. Your status changes to Available.
Note: If you sent the email during a call, you must make the call active again by going to your Inbox and, for the appropriate call, clicking:

Related reference
Inbox
Current Email
Active Item (email)
Notes